A ProudNet AMI is an Amazon Machine Image (AMI) created on an EC2 instance with default settings.
Verification for unlimited concurrent licenses per ProudNet device Install the necessary programs to run the server program developed using ProudNet
Windows Server AMI
Visual C++ 2015~2019 x64 Redistribution Packages
DotNet Core 3.1
DotNet 5.0
CentOS7 AMI
unixODBC-devel
openssl-devel
wget
mono-complete
Development Tools ( installed by yum groupinstall )
CMake
DotNet Core 3.1 SDK ( runtime inclusive )
DotNet 5.0 ( runtime inclusive )
dotnet-sos ( enables analysis of dump files for dotnet core programs created on Linux. )
lldb
Linux CentOS7 AMI
It is preset to leave a core dump when a crash occurs.
Create an EC2 instance with ProudNet AMI
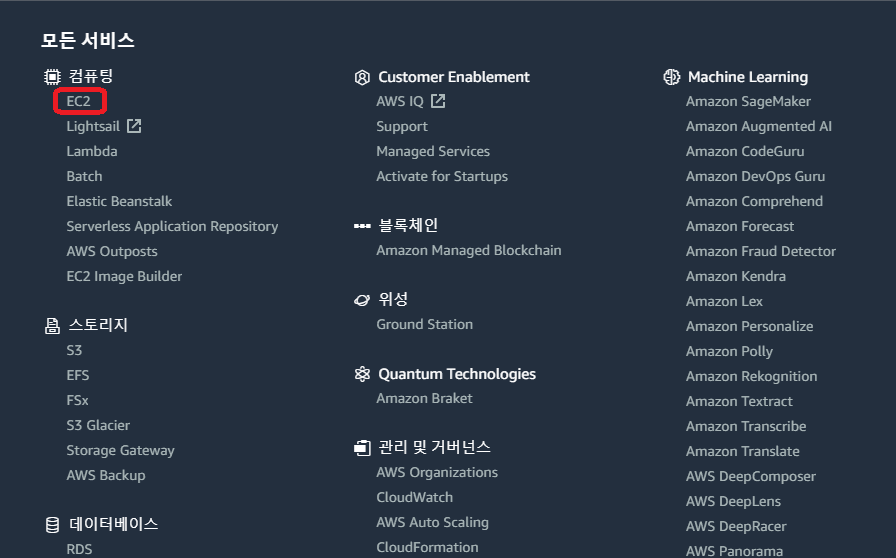
Enter the EC2 service.
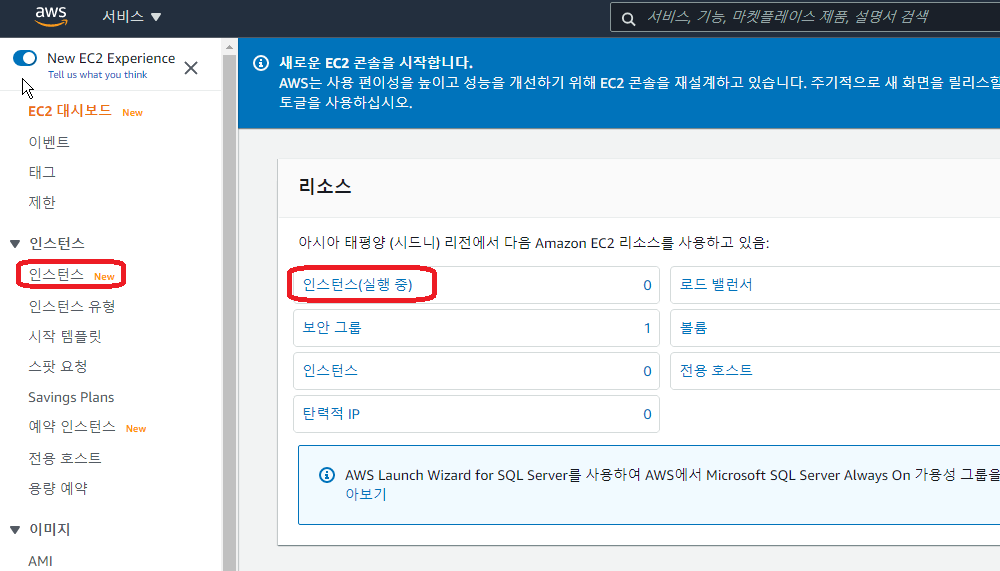
On the EC2 page, select the Instance menu.
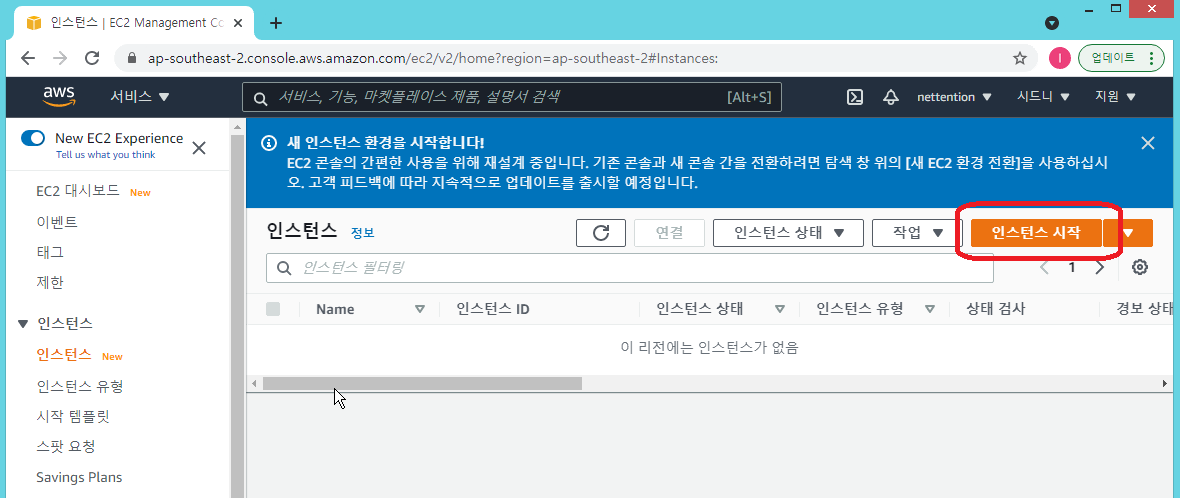
On the Instances page, click the Start Instance button in the upper-right corner.
Step 1: On the Select AMI page, select the AWS Marketplace tab on the left.
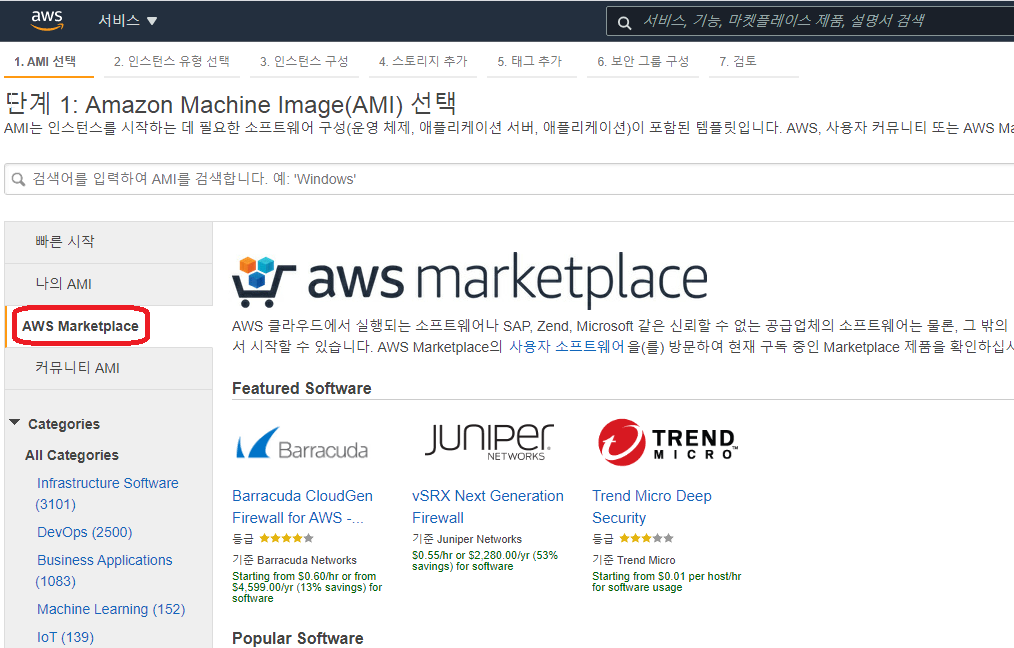
Type ProudNet in the search bar.
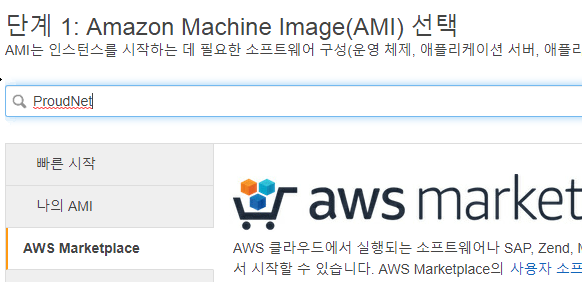
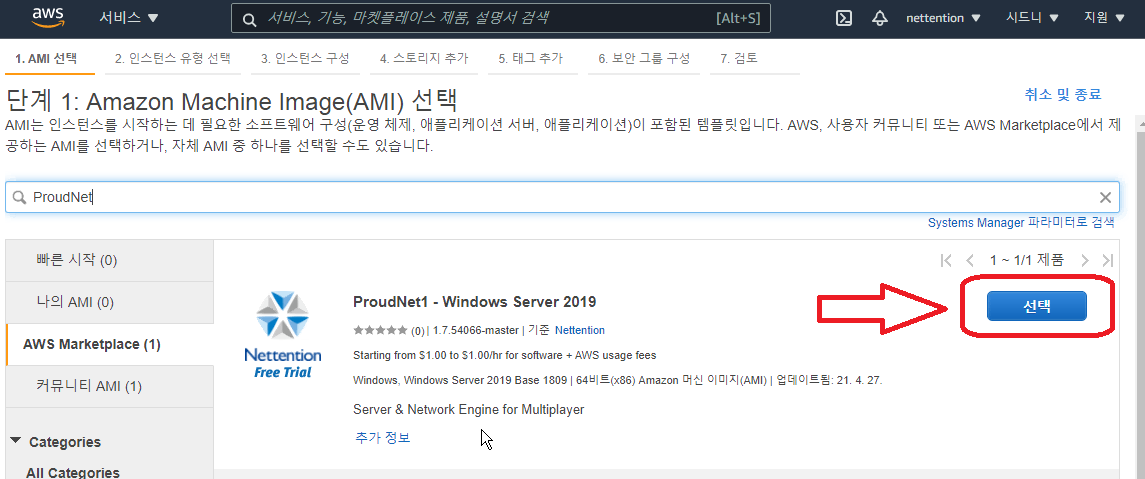
From the PN1 AMIs found, click the Select button next to the AMI for your OS.
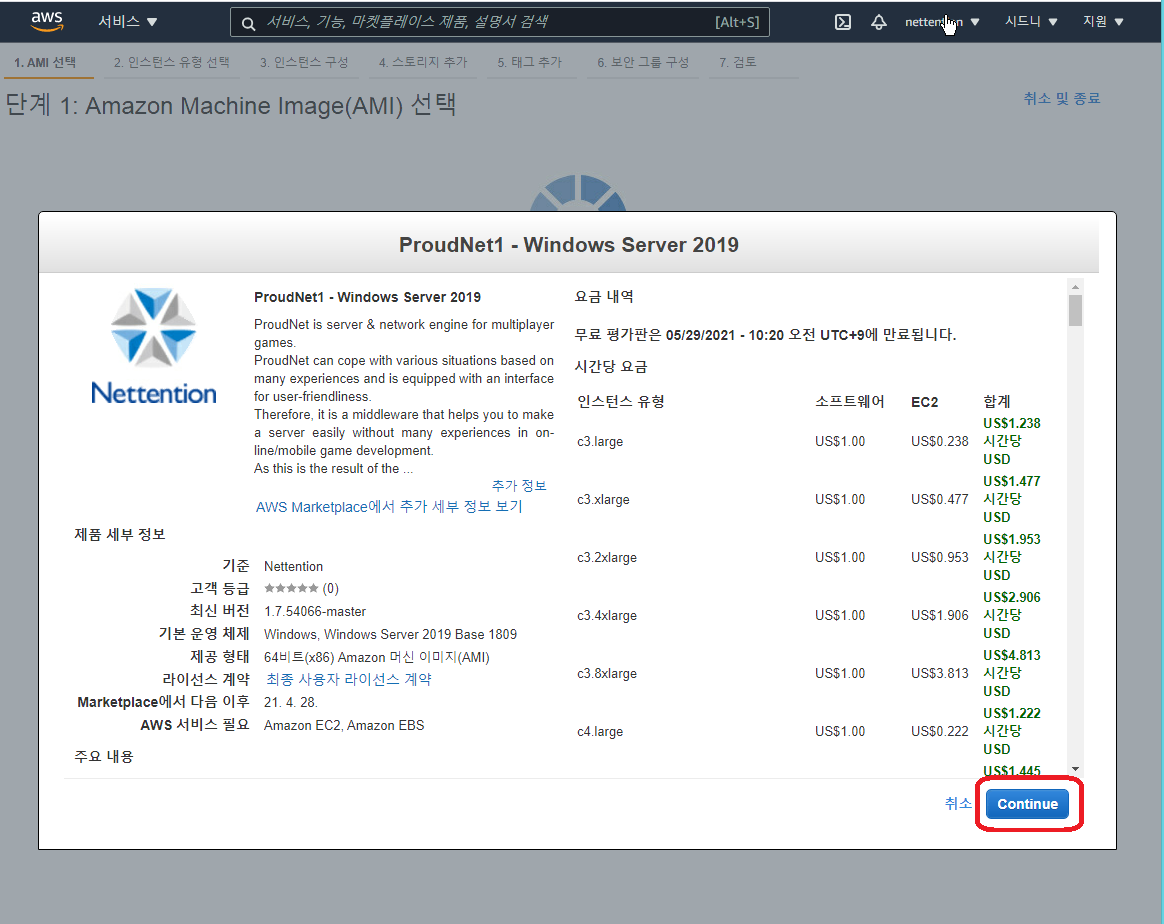
A detailed description of the PN1 AMI will appear. Click the Continue button in the bottom right corner, and from there you will be taken through the usual EC2 creation pages (performance selection, key pairs registration, etc.).
A security group with a name starting with the string ProudNet1 is automatically created and applied to the EC2 created using the above method. This security group is only allowing inbound ports 9,000-9,100 for TCP & UDP, and outbound for all traffic. - Windows you'll need to add the TCP 3389 port to your inbound rules to use RDP. - Linux if you want to use SSH, you'll need to add the TCP 22 port to your inbound rules, as it could be a security vulnerability if you add it by default. When specifying the server's listening port and the UDP ports to use for P2P in static assign mode, you can choose from ports in the range 9,000 - 9,100.
Windows Server EC2 Instance
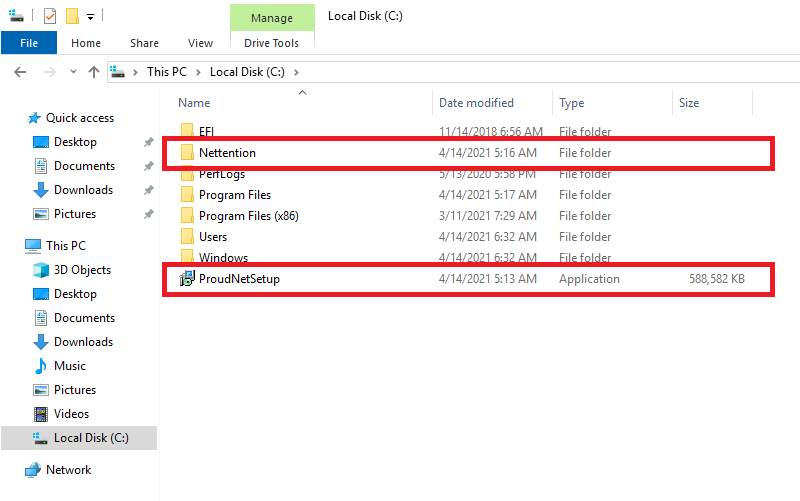
Remotely connect to the created EC2 instance via RDP. As shown in the screenshot above, under C:\, you will find the Nettention folder and the ProudNetSetup installation file.
To use ProudNet Windows AMI for Auto Scaling, etc., please follow the steps below.
When an EC2 instance is created, metadata & user data are used.
User data allows you to insert your server executables and the files needed to execute them in the following locations, depending on the language you used to develop them. ➡️ If your server is developed in DotNet or DotNet Core put the server executable and the files required to execute in C:\Nettention\ProudNet\Sample\bin\netcoreapp3.1. ➡️ If your server is developed in C++ put the server executable and the files required to execute in C:\Nettention\ProudNet\lib${platform}\dll${Configuration}. ( You can also put them in C:\Nettention\ProudNet\Sample\bin\Release.C:\Nettention\ProudNet\Sample\bin\Release.)
If the server executable file is inserted immediately after launch, the inserted server executable file is executed through user data.
To use ProudNet locally on your development PC, please download the installation file from the ProudNet Github.
Linux ( CentOS7 ) EC2 Instance
If you connect to the created CentOS7 instance, you will see a ProudNet folder in the root directory( / ).
To use ProudNet Linux AMI for Auto Scaling, etc., please follow the below steps.
When an EC2 instance is created, metadata & user data are used.
User data allows you to insert your server executables and the files needed to execute them in the following locations, depending on the language you used to develop them. ➡️ If your server is developed in DotNet or DotNet Core put the server executable and the files required to execute in /ProudNet/bin/${Configuration}. ( Make sure to include all of your Publish output, not just your Build output. If your program is named project, you'll need to include not only project.dll, but also project.deps.json and project.runtimeconfig.json. ) If it is a Release version, it is /ProudNet/bin/Release. ➡️ If your server is developed in C++ put the server executable and the files required to execute in /ProudNet/lib/x86_x64-linux/${Configuration}.
If the server executable file is inserted immediately after launch, the inserted server executable file is executed through user data.
To use ProudNet locally on your development PC, please download the installation file from the ProudNet Github.
For meta data & user data in EC2, please refer to the AWS manual at the link below.
Link: AWS docs
Use in CloudFormation
If you are using ProudNet1 AMI for intra-modeling and provisioning with AWS CloudFormation, you can use the templates we provide to create your stack in the following path.
For more information about intra-modeling and provisioning using AWS CloudFormation, see the AWS Manual page.
Link: AWS docs
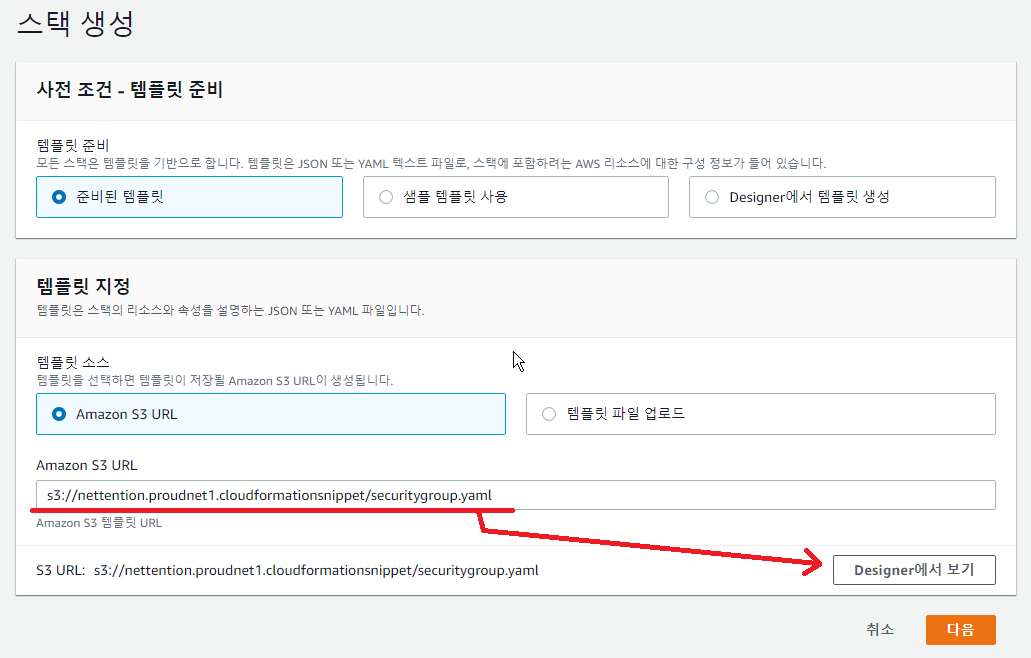
The template we provide contains the SecurityGroup settings for ProudNet.
As shown in the screenshot below, you can view the full text of the provided template by entering the S3 URL when creating the stack and then clicking the View in Designer button.