ProudNet.Eng
WebsiteProud ConsoleLanguage
  • 🌐ProudNet
    • ProudNet Introduction
    • Download and Install
      • How to verify your ProudNet license
      • AMI
    • Project Settings
      • C++
      • C#
      • Mac Xcode
      • Linux
      • Unity3D
        • iOS Build
      • Unreal Engine 4
      • Running the PIDL Compiler
    • Using ProudNet
      • Server and Client
        • Utilization of Server
        • Utilization of Client
      • RMI
        • Utilization of RMI
      • PIDL
        • Utilization of PIDL
      • Event handling
      • Communication messages
      • P2P Communication
        • Using P2P communication
    • Utilization of ProudNet
      • How to use
      • Tips for performance
    • Using DB in ProudNet
      • DB Cache System ver.2
        • DB Cache Theory and Understanding
        • Install DB Cache and Set Up Network
        • DB Cache Server and Client
        • DB Cache usage and application
          • Utilization of DB Cache
      • ADO API
      • ODBC API
    • ProudNet Utility
  • ProudNet Note
    • Technical Notes
      • Main Loop
      • Setting up a server firewall
      • Encryption and decryption
      • What to do in case of an error
      • List of error messages
      • Synchronizing Character Position
      • Client-Server Communication
      • MiniDump (Error Dump System)
      • [Version 1.6] Server-to-Server LAN Communicator
    • Glossary
    • Sample examples
  • 🌐Proud Service
    • Guide for Console
    • ProudChat
      • Download SDK
        • C++
        • C#
        • Unity3D
        • Unreal Engine 4
      • Features in Console
Powered by GitBook
On this page
  • 1. plugins copy and paste
  • 2. Plugin common settings
  • - Select x86, x86_64 plugins
  • - Select a plugin from the Stripped folder
  • 3. Setting up plugins based on your environment
  • - Mac
  • - Windows or Android
  • - WebGL
  • 4. Creating a script
  • 5. iOS Build
  • Back
  1. ProudNet
  2. Project Settings

Unity3D

Last updated 1 year ago

Put the lib/Plugins folder and files from the ProudNet installation path into Assets/Plugins in your Unity project path, and the ProudNet library will be included in your project.

The detailed process is as follows.

1. plugins copy and paste
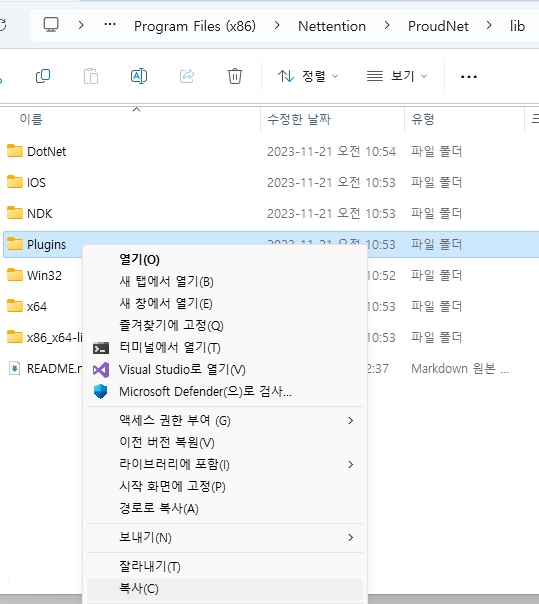
Copy Plugins from the ProudNet installation path.
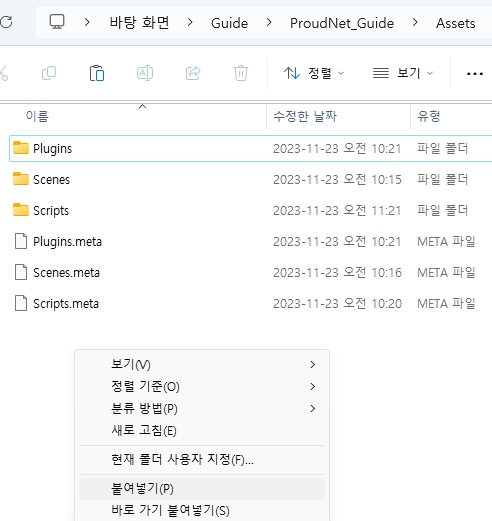
Paste the copied files into the Plugins folder of the Unity project where you want to use ProudNet.

2. Plugin common settings

- Select x86, x86_64 plugins
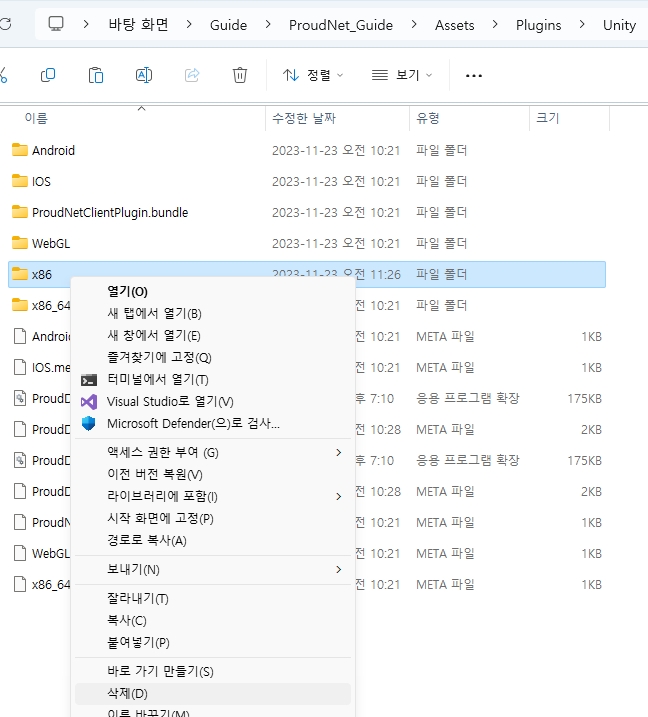
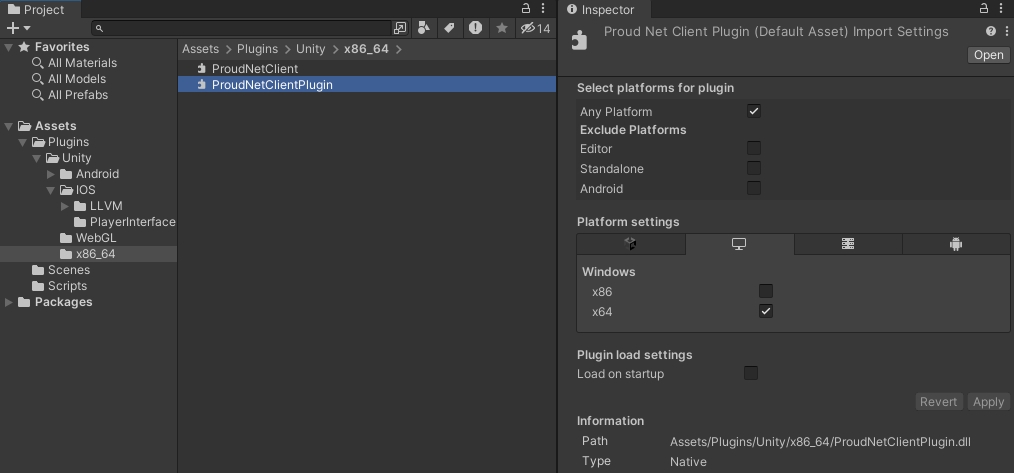
The photo below is an example of using the x86_64 plugin to delete the x86 folder.

Delete the x86 folder because if you leave it unused, it may duplicate the contents of x86_64.
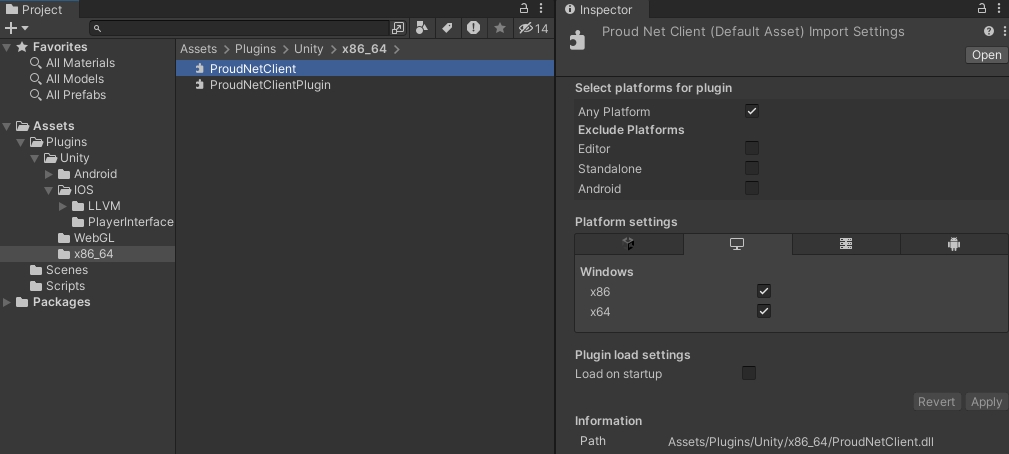
Change the plugin file settings inside x86_64 to use it.

- Select a plugin from the Stripped folder

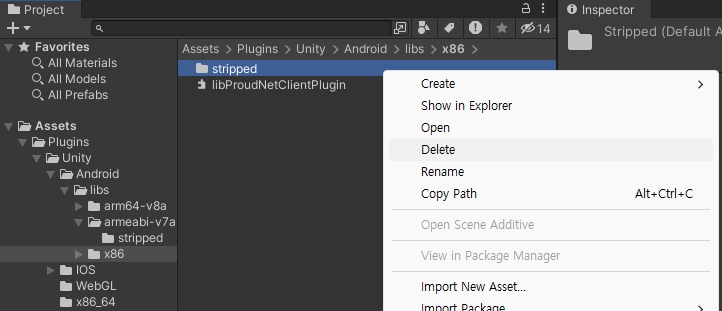
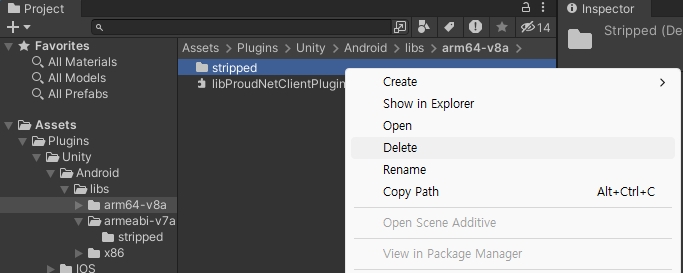
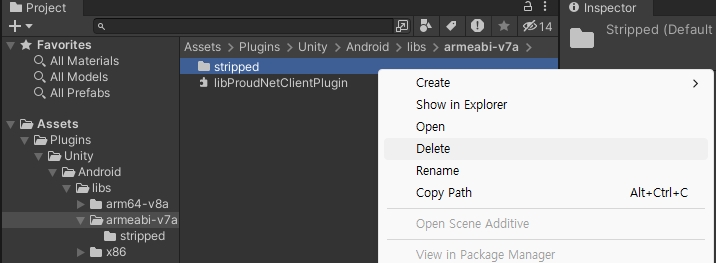
If you check the Plugins folder in your Unity project, it contains plugins as shown in the photo below. The plugins in the stripped folder are the same as the ones outside, but the ones in the stripped folder contain symbols, so keep the ones you need and delete the ones you do not use.

The photo below shows an example of deleting a stripped folder to use a plugin that does not contain symbols.

If you do not delete one of the plugins in the stripped folder and one of the plugins outside of it, you might get an error at build time.
3. Setting up plugins based on your environment

- Mac
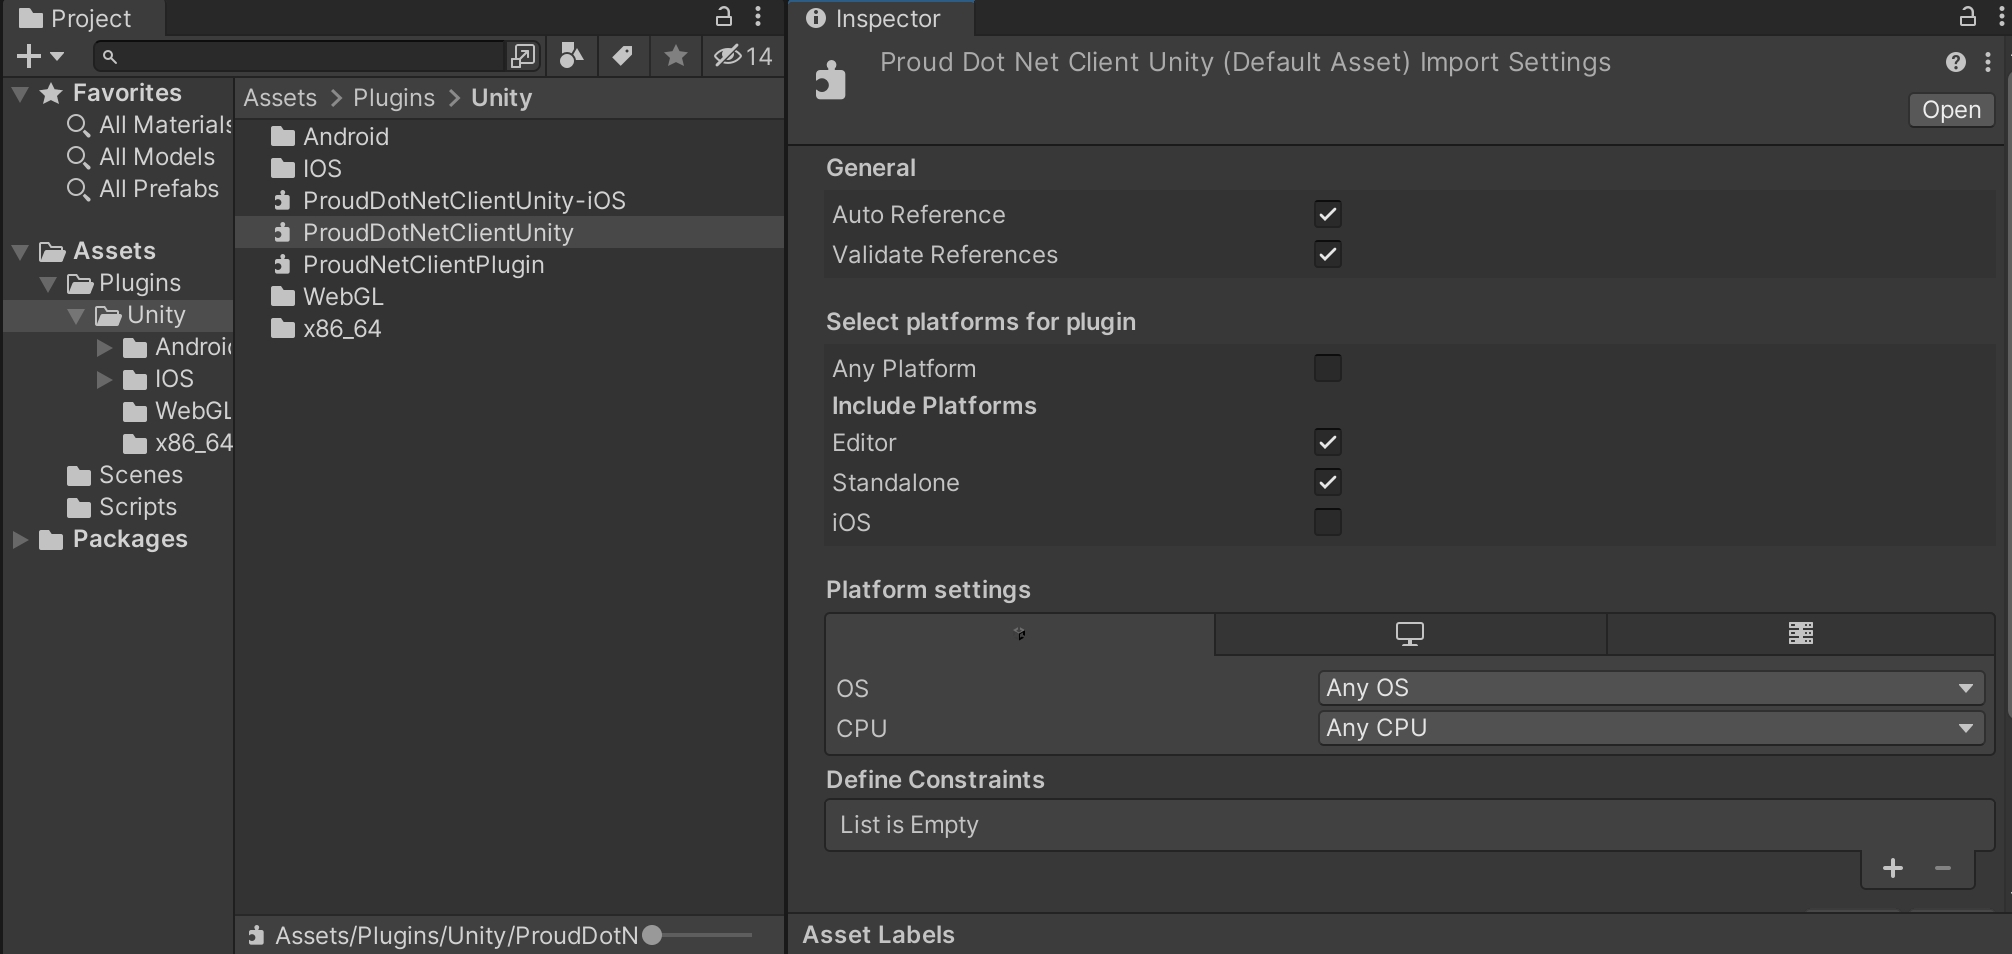
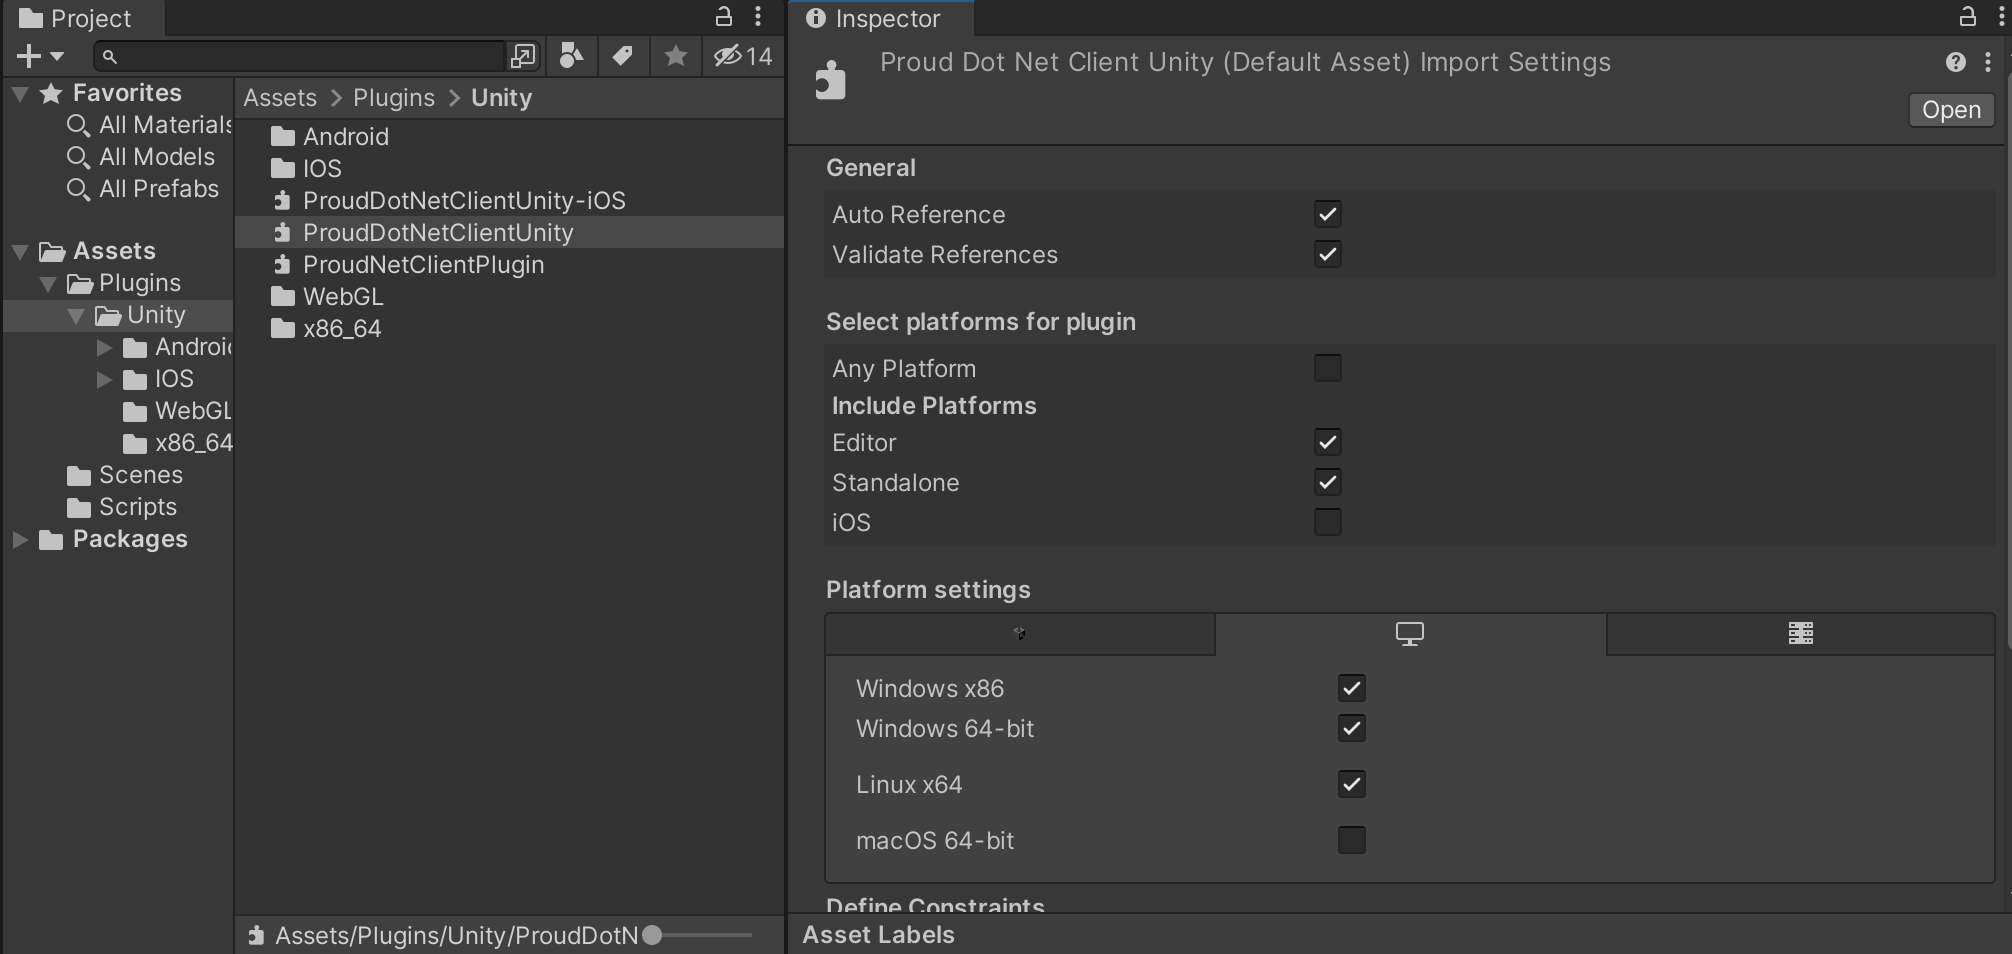
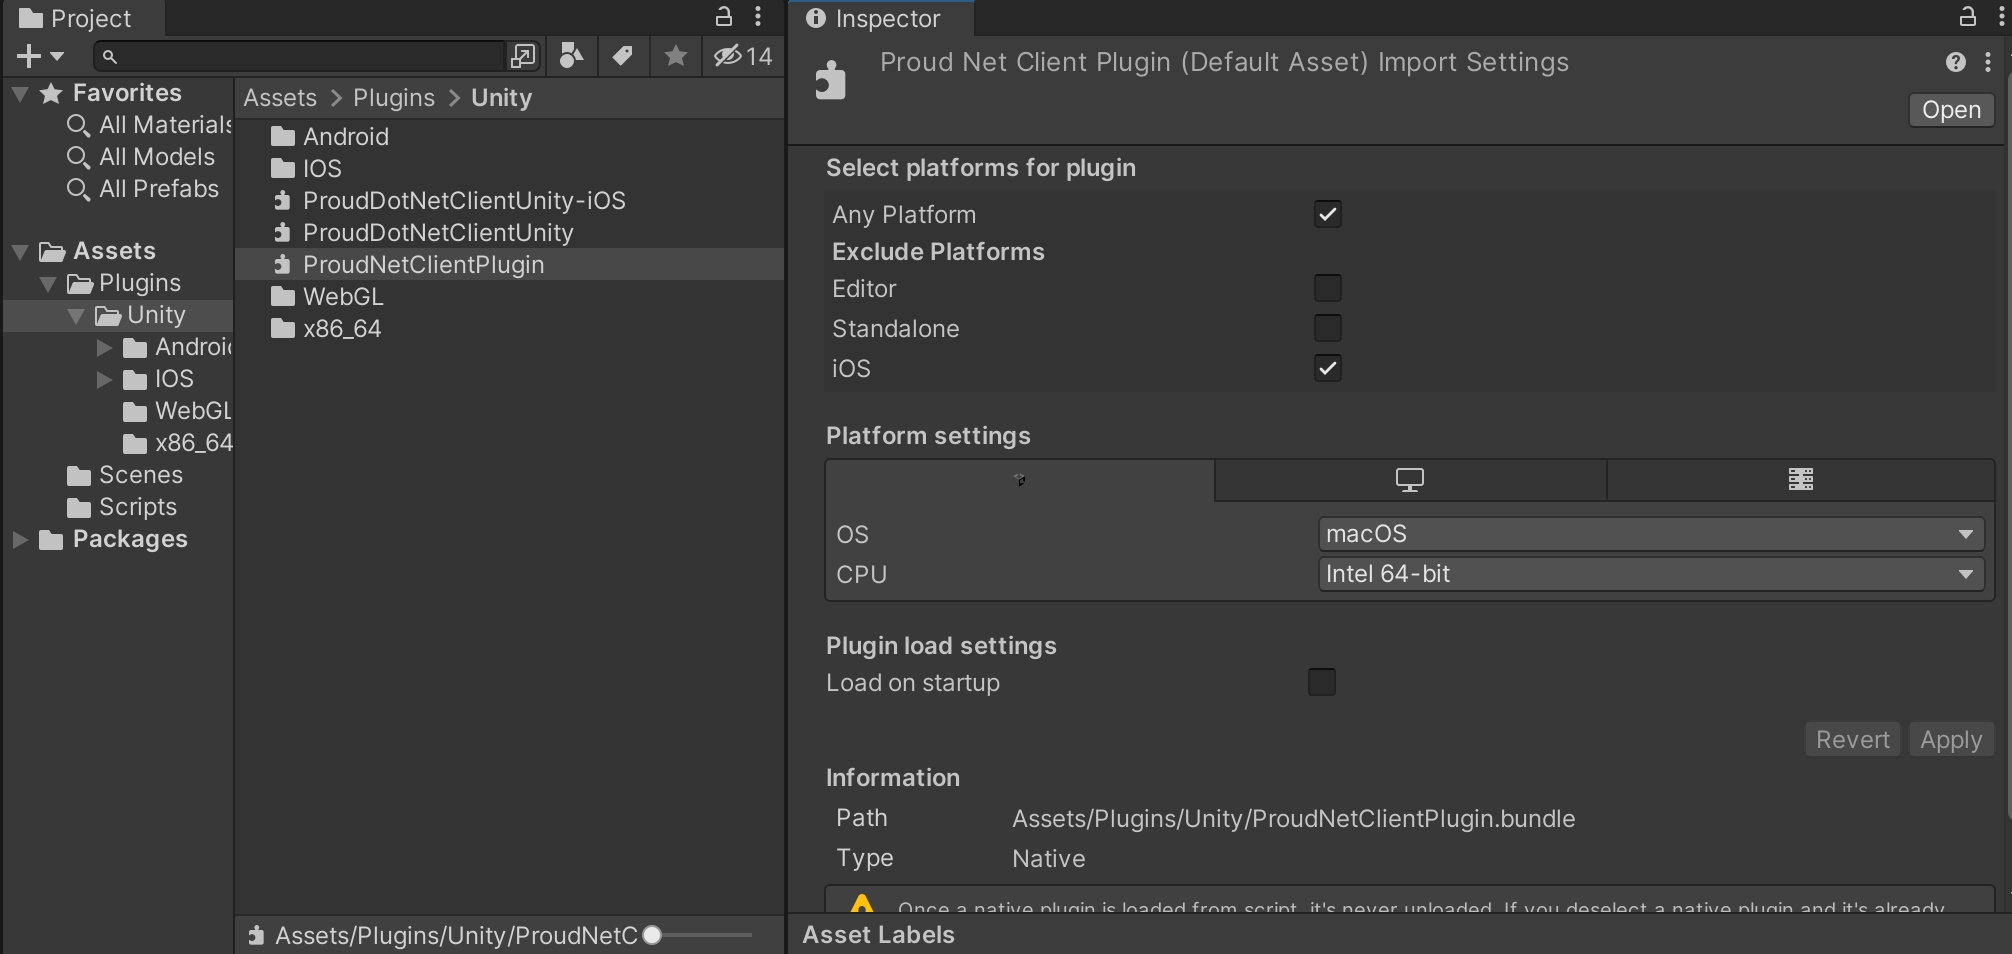
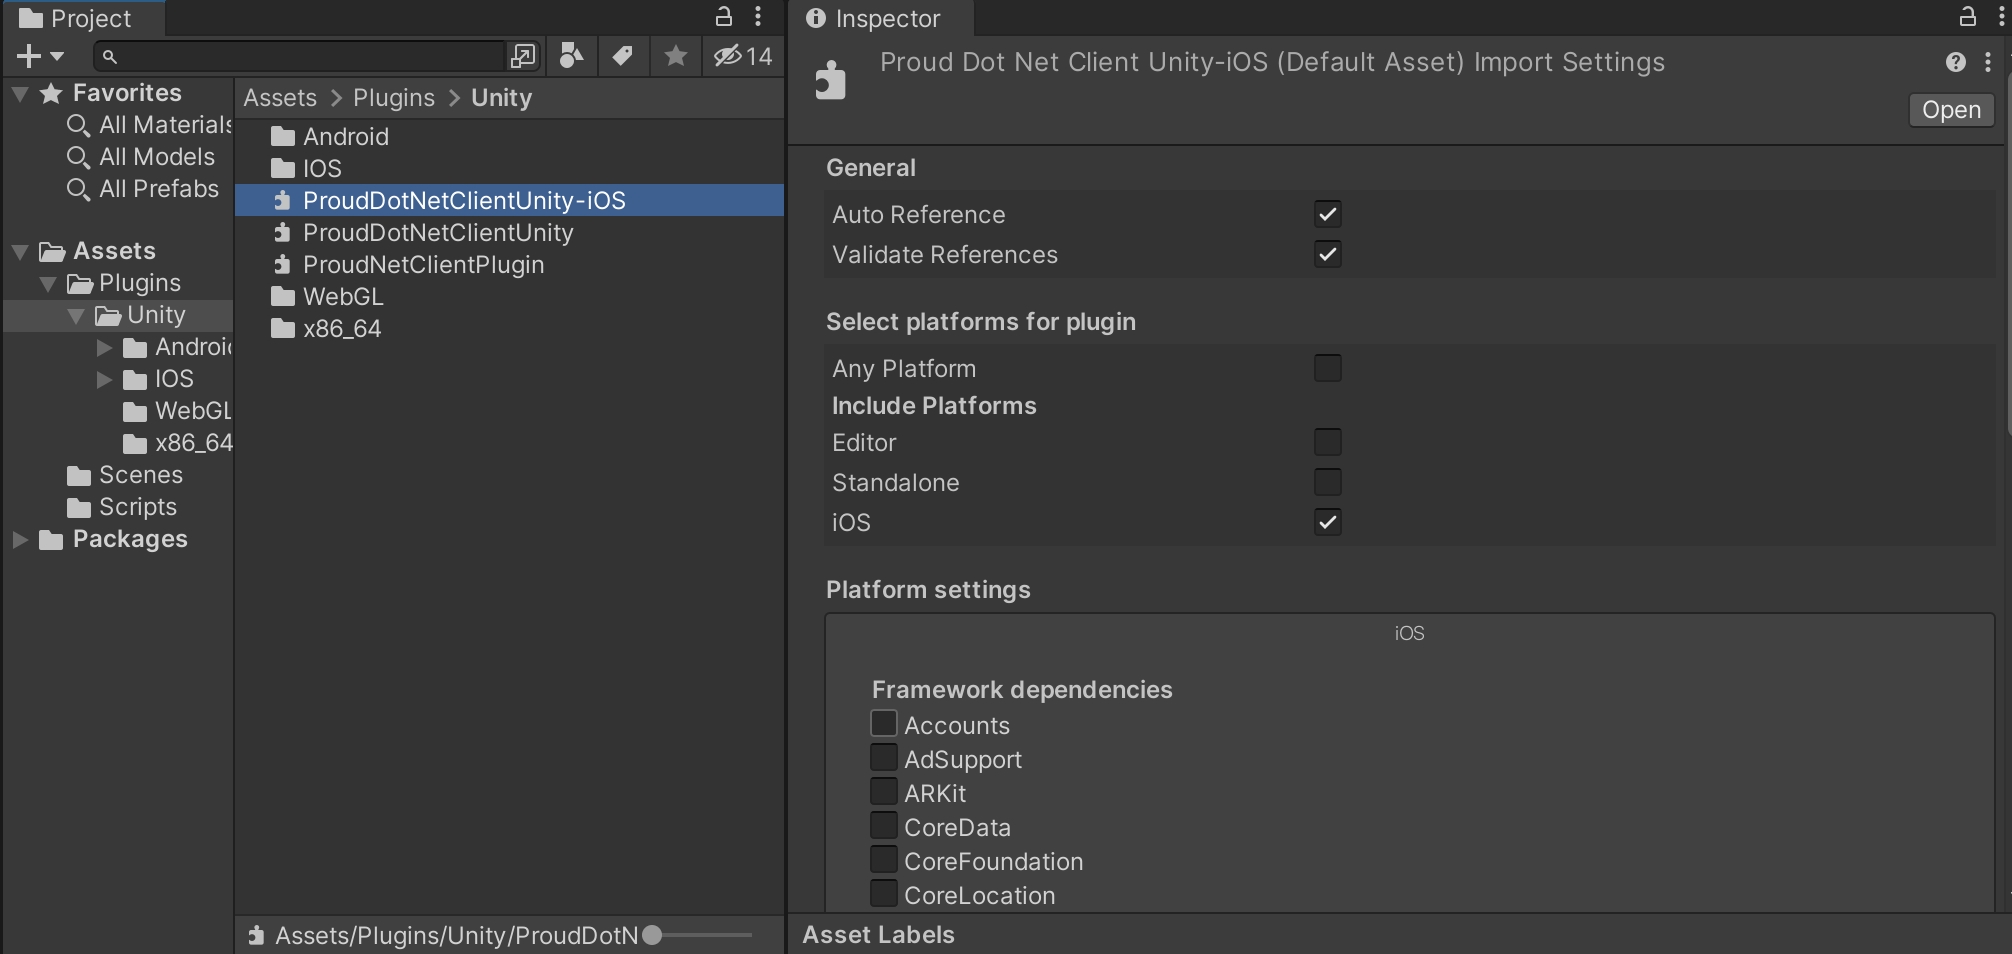
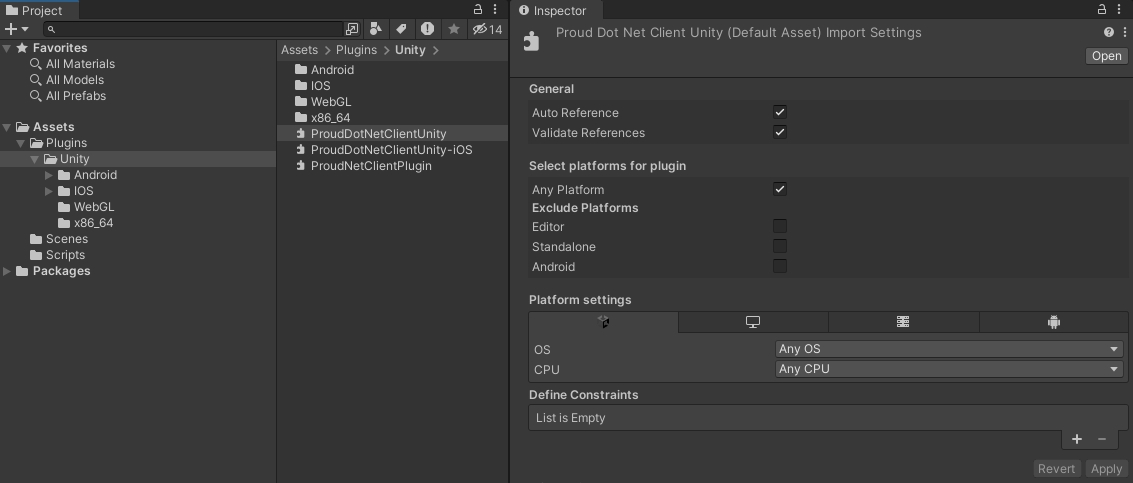
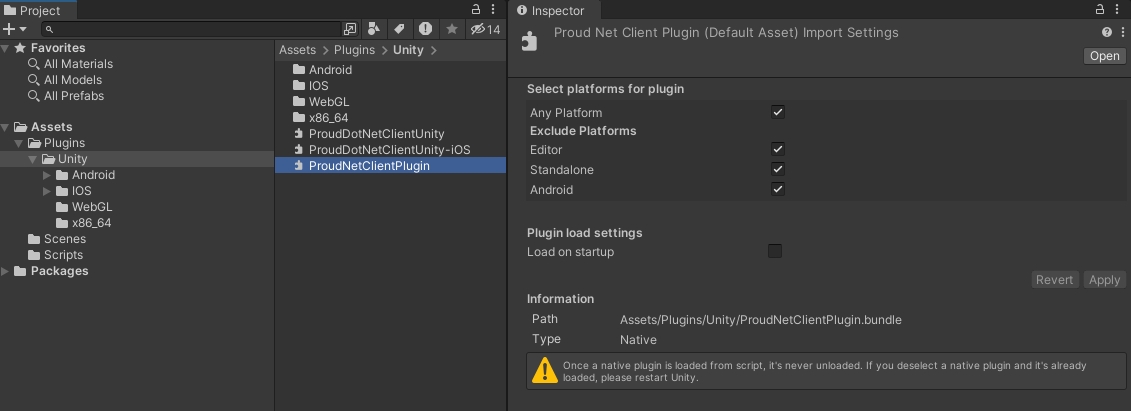
The other plugins can be used by default, but if you are on iOS, you will need to set up the plugins as shown in the photos above.

- Windows or Android

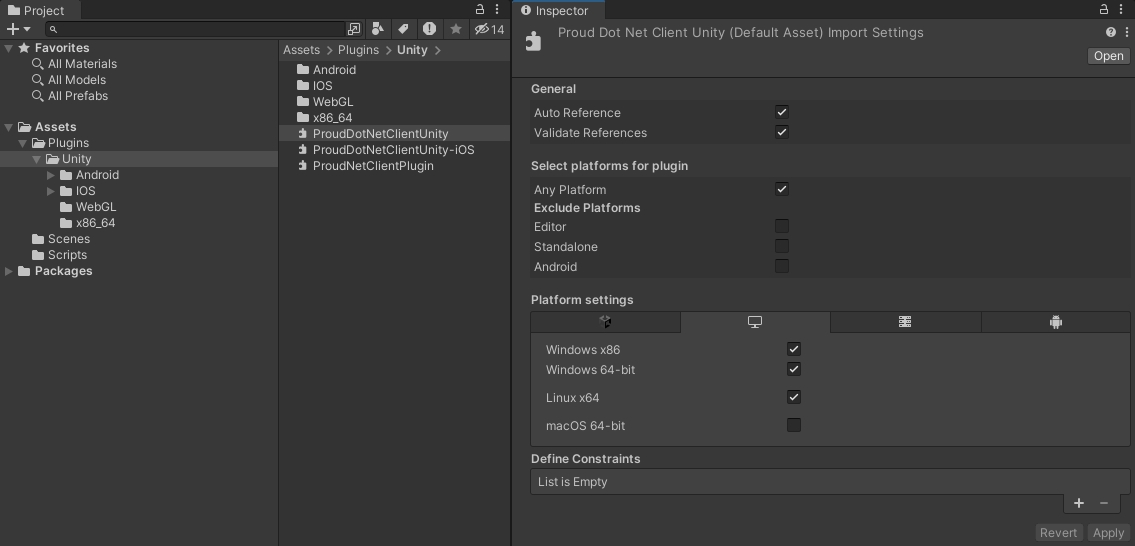
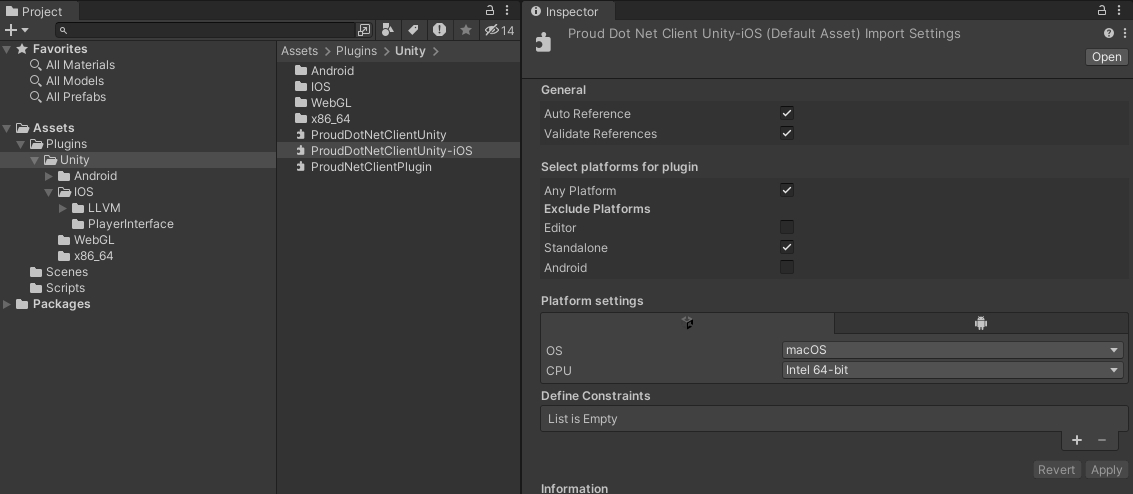
If you are on Windows or Android, proceed as follows to set up the plugin.
- WebGL

Under /Assets/Plugins/WebGL, you will find WebGL-specific plugins.

Unity will automatically recognize the plugin as being built with WebGL; If it's not WebGL, other plugins should not be built with it when the build platform WebGL is selected.

If you get an error like 'XXX' could not be found, it means that WebGL-related plugins have not been added properly, and if you get an error like 'XXX' already defined, it means that there is a conflict with another plugin.

Select the plugin and set JSClient.jslib and ProudNetClientPlugin-webgl.dll to be included in the WebGL build as shown in the Inspector window.
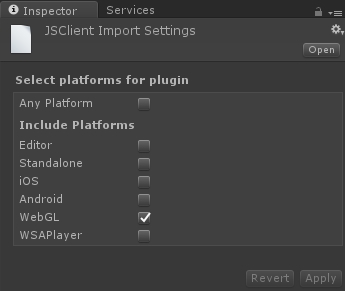
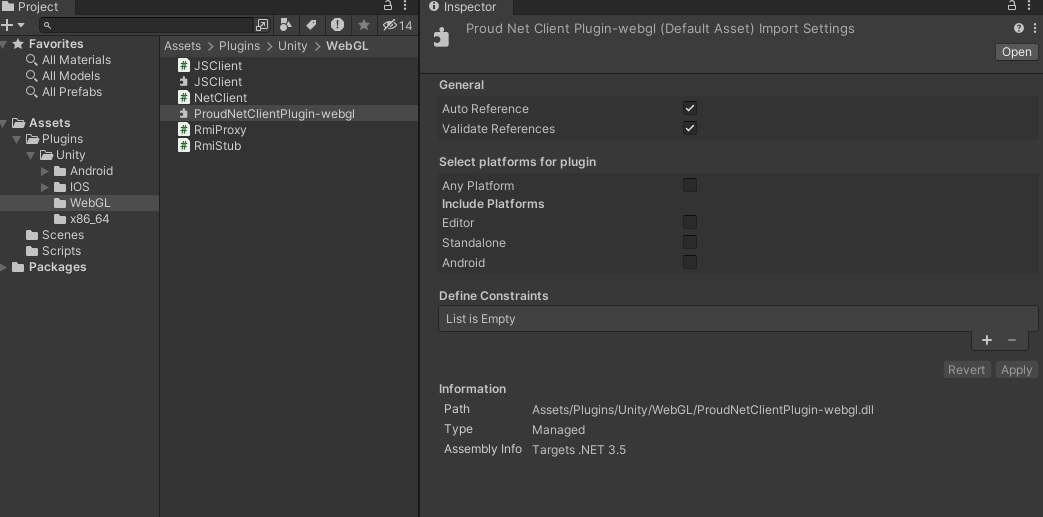
To prevent other plugins from being included in the WebGL build, you can uncheck Any Platform and check only the platforms you want.

4. Creating a script
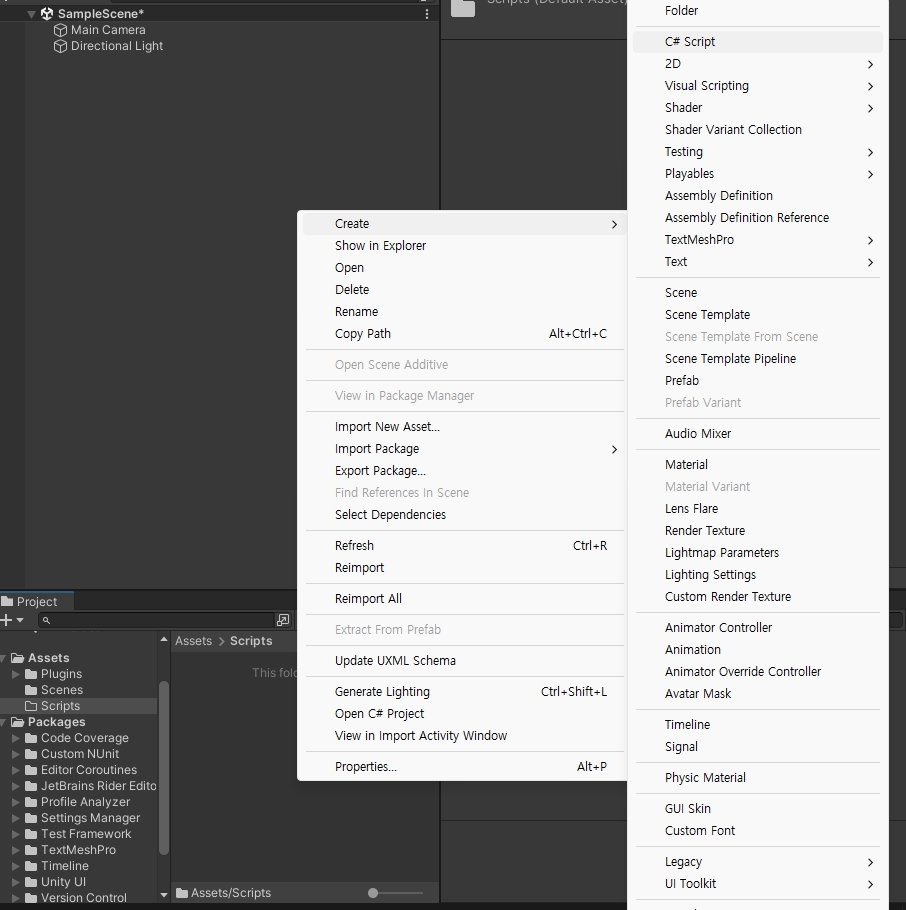
After everything is set up, create a script to create the NetClient.
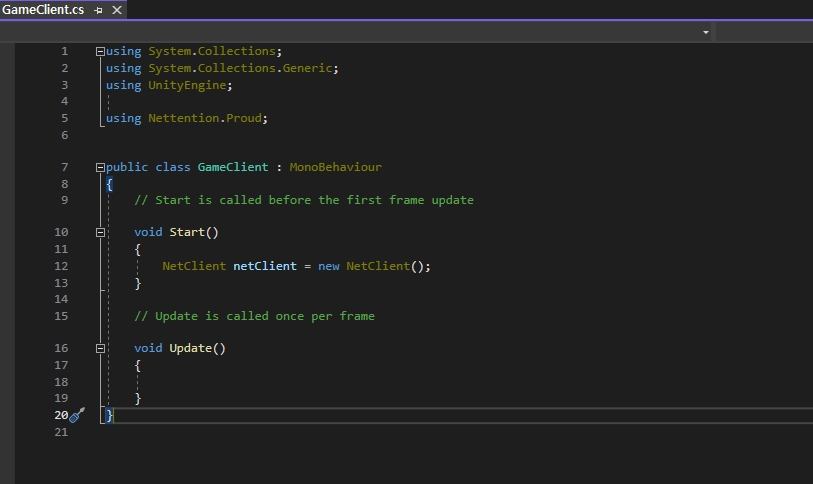
As in the example above, you can create a NetClient normally without any compilation errors.
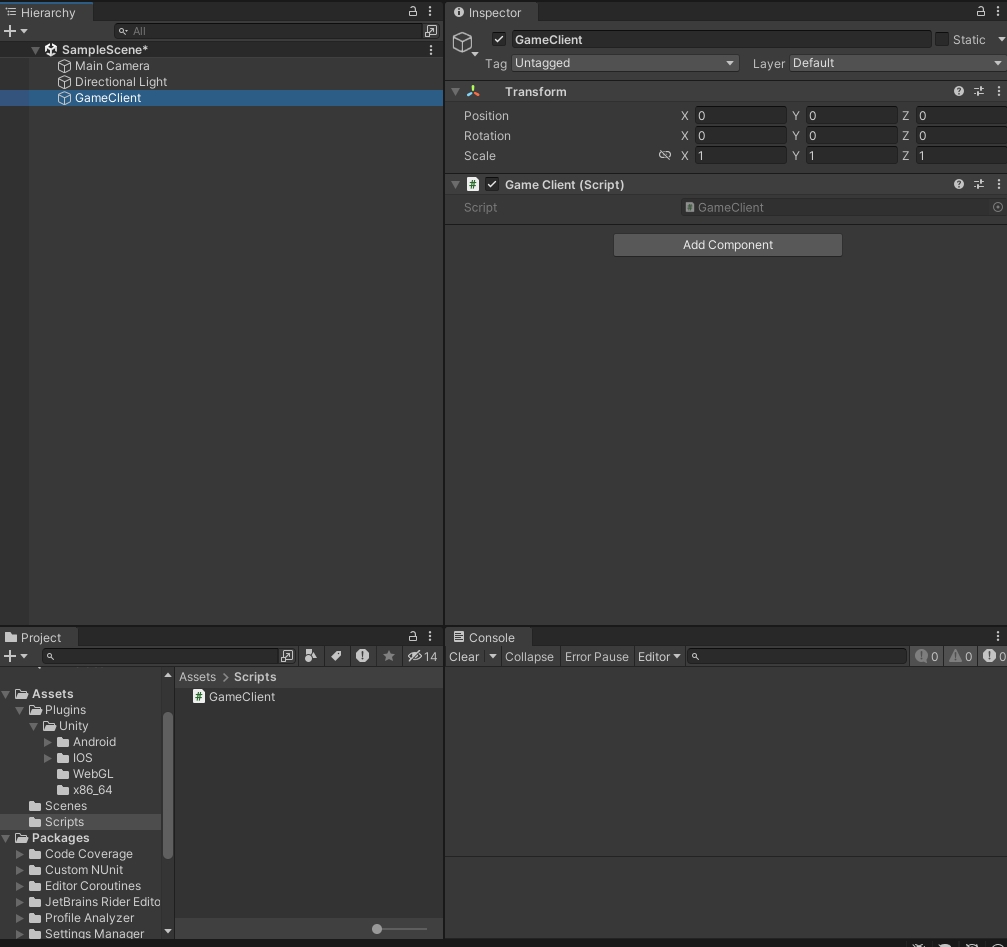
You can use the script file you created by adding it as a component to the Game Object you want to use as a client.

5. iOS Build


For iOS, please see .

🌐
iOS Build
⬅️
Back
Move to the ProudNet installation path
Unity Project Path
Delete the x86 folder inside the Plugins folder in your Unity project path
libs -> arm64-v8a -> Delete the stripped folder.
libs -> armeabi-v7a -> Delete the stripped folder.
libs -> x86 -> Delete the stripped folder.
Mac - ProudDotNetClientUnity
Mac - ProudNetClientPlugin
Mac - ProudDotNetClientUnity-IOS
ProudDotNetClientUnity-IOS
Window - ProudDotNetClientUnity
Window - ProudDotClienPlugin
CS file to use as a client
Example of adding GameClient.cs as a component to an empty Game Object